OwlEye Necklace - Jewelry That Helps Visually Impaired People Navigate
OwlEye Necklace - Jewelry That Helps Visually Impaired People Navigate : Ones i was going to take part in Junction 2020 hackathon, and i get an idea - why not to try to make simple device what can help visually impaired better navigate in space and that look like necklace? And thats why i decide to make OwlEye project (n…
Открыть оригинал →
OwlEye Necklace - Jewelry That Helps Visually Impaired People Navigate
Это архивная копия статьи. Оригинал на Instructables
Introduction: OwlEye Necklace - Jewelry That Helps Visually Impaired People Navigate

Ones i was going to take part in Junction 2020 hackathon, and i get an idea - why not to try to make simple device what can help visually impaired better navigate in space and that look like necklace?
And thats why i decide to make OwlEye project (not perfect, but a good start for next versions and everyone who decide to make same device for people who need them).
Github repository with code for arduino and additional materials - https://github.com/m0rg0t/OwlEye/
And site where i put all materials about project too - https://owleye.space/
Supplies


- arduino nano or other compatible board
- eva foam or pla and 3d printer for owl necklace
- HC-SR04 ultrasonic sensor
- HW-131 power board
- Buzzer
- LEDs
- Vibro motor
- wires, solder and so on
- chain or rope for necklace
Step 1: Sketch of Necklace

So first of all i make sketch of owl on a paper with sizes i’d like to get.
Then i make photo of sketch and clean it up and make more contrast to make work later easier
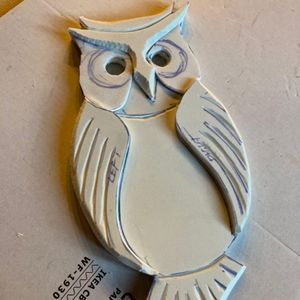
Step 2: Creating Owl Prototype From Eva Foam


Step 3: Creating 3d Model of Necklace (for 3d Printing)

For 3d modeled owl necklace i deside to use Fusion 360 to make model based on my sketch by importing my drawing and creating “sketch” that after i extrude section by section until i make nessesary owl shape.
But unfortunately i have no time to print it, so left it until next update of this necklace (and this instructuble too)
Attachments
Step 4: Create Scheme for Owl Functionality


First of all i draw initial scheme on paper to understand what and where i want to connect
And also i make scheme on tinkercad for more clear view
Step 5: Writing Arduino Code
Code is very simple and have comments, but lets start from constants section, where i store information about pins i use to connect sensors and output devices
const int VIBRO_PIN = 2; //Digital pin where vibro attahed const int LED_PIN = 3; //Digital pin where led attached const int BUZZER_PIN = 4; //Digital pin where buzzer sound stuff is attached const int HC_TRIG_PIN = 12; //Triger pin of HC-SR04 sensor const int HC_ECHO_PIN = 13; //Echo pin of HC-SR04 sensor
and additional constants that affects how vibro works and so on and you can play with this params to adjast it
const int MIN_TIME = 10; //minimal amount of time we use const int SIGNAL_INCREMENT_TIME = MIN_TIME * 3; const int SIGNAL_PLAY_TIME = 20;
const int VIBRO_ADDITIONAL_TIME = 10;
And all code is available at github https://github.com/m0rg0t/OwlEye/
Step 6: Adding Scheme on Owl

prototype case i just glue al scheme component to owl, but in case of 3d printed one it’s possible to add slots for all electronic parts
Step 7: Testing Necklace and Adjusting Constants in Code for Better User Experiense
So now all components of owl is assembled, painted and so on we can start testing it.
Step 8: All Work Is Done
And then all work is done i make final pitch video with project description and tests
Галерея